ServerKit GameMaker: Easily Manage GameMaker Servers
One of the more annoying aspects of running GameMaker servers is managing and updating them. Unless you're a seasoned backend developer who's familiar with all the tools like docker, kubernetes, CI/CD pipelines, bash scripting, and so on, doing server administration is a chore and there's a lot to learn.
To help with this, I've cooked up a server-management tool that can be easily installed, to create a nice web interface for managing your gamemaker servers. The idea is that once you add this to a server, you can do all your management from a web interface. Saving you from having to deal with scripts, remote access, and stuff like that. I call it ServerKit GameMaker, and it's open source and built in GameMaker itself, in case you want to get your hands dirty and dive into it.
How to manage GameMaker Servers with SKGM
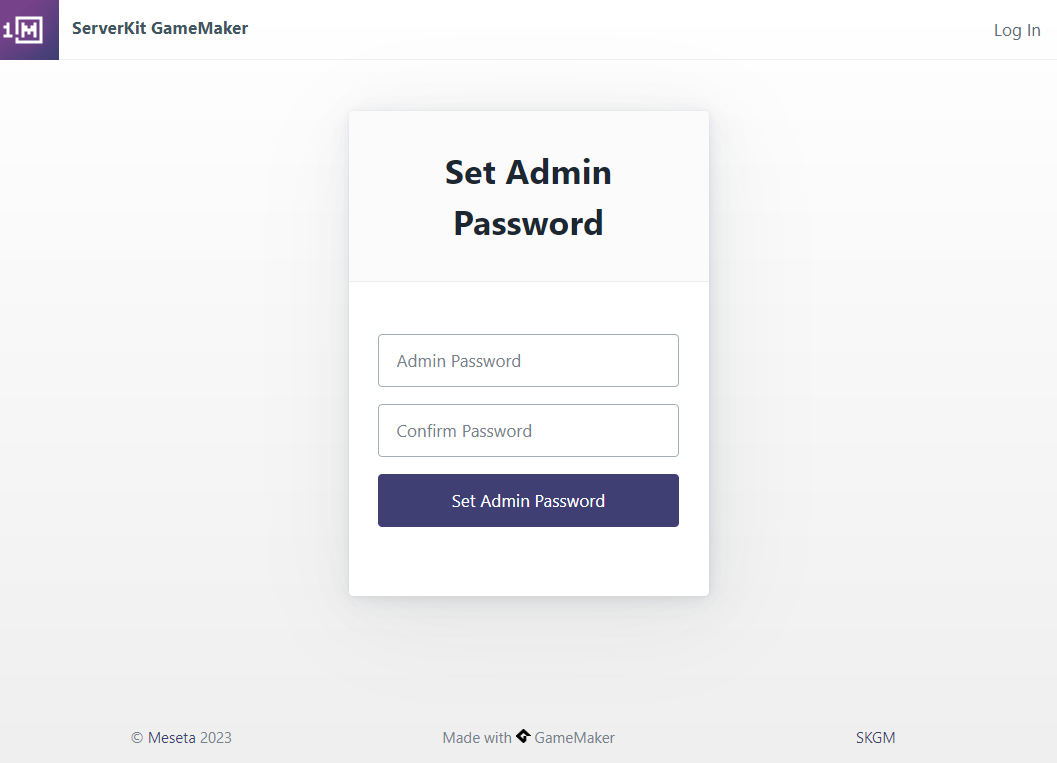
Before I dive into the installation and setup, let me walk you through what having SKGM looks like: Once you have SKGM installed on the server, the first time you go to the management console, you'll be asked to set up an admin password.
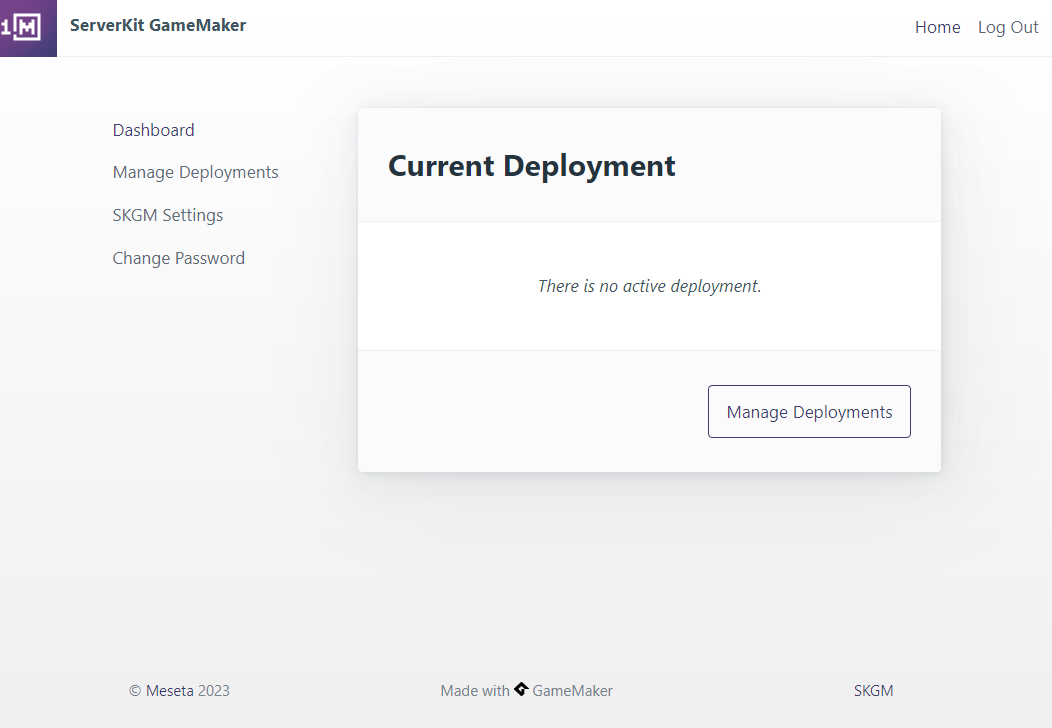
After you set up your password, and log in with it. You'll see the Dashboard. This is where your running gamemaker server will show up. For now, it's empty. Click on Manage Deployments to get to your deployment list:
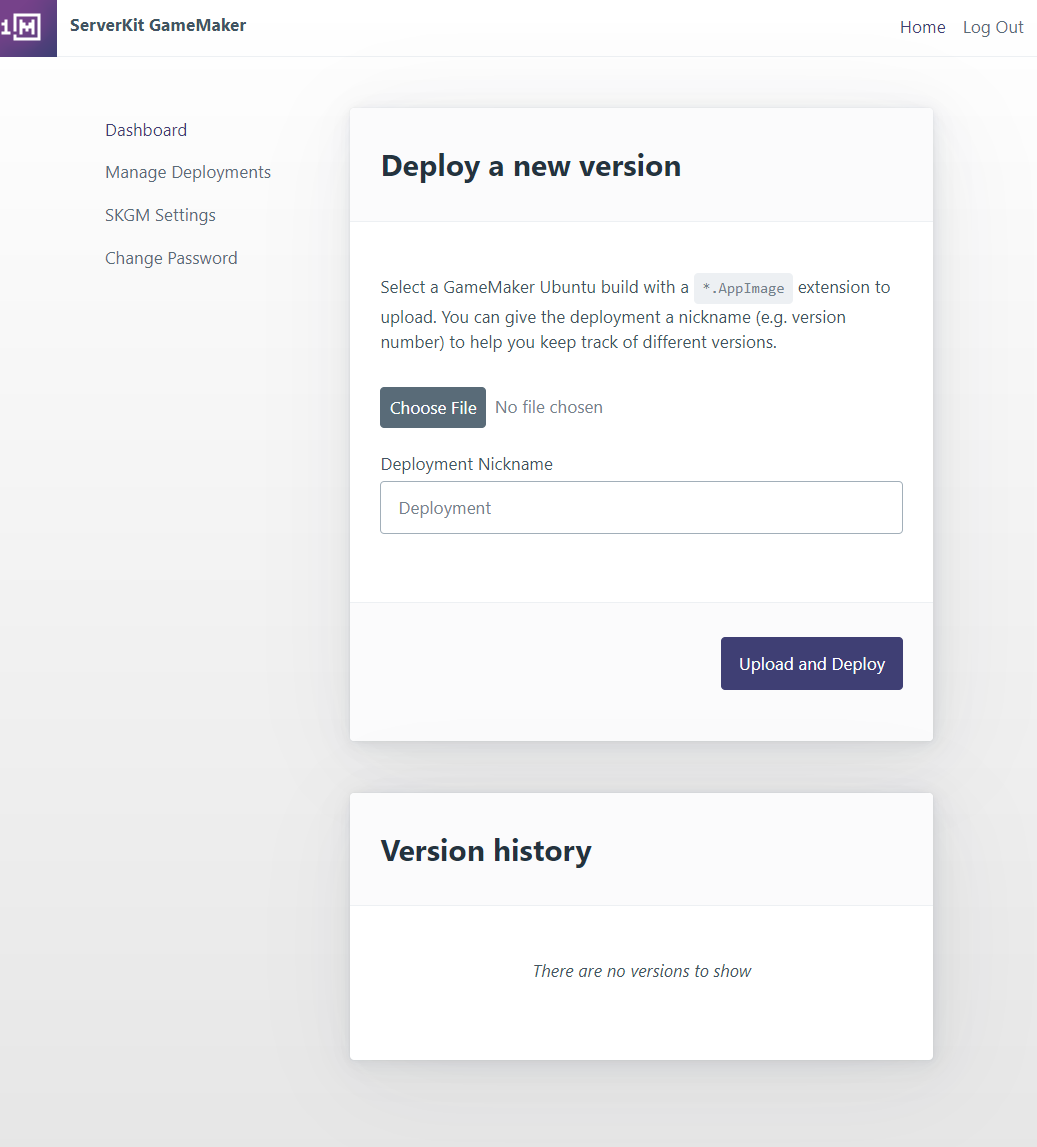
In the Deploy a new version section, you can select your gamemaker server that you want to deploy, in *.AppImage format. This is what you get if you do an Ubuntu Build from the IDE.
Once you've uploaded it, you can go back to Dashboard, where you can now see your current server running
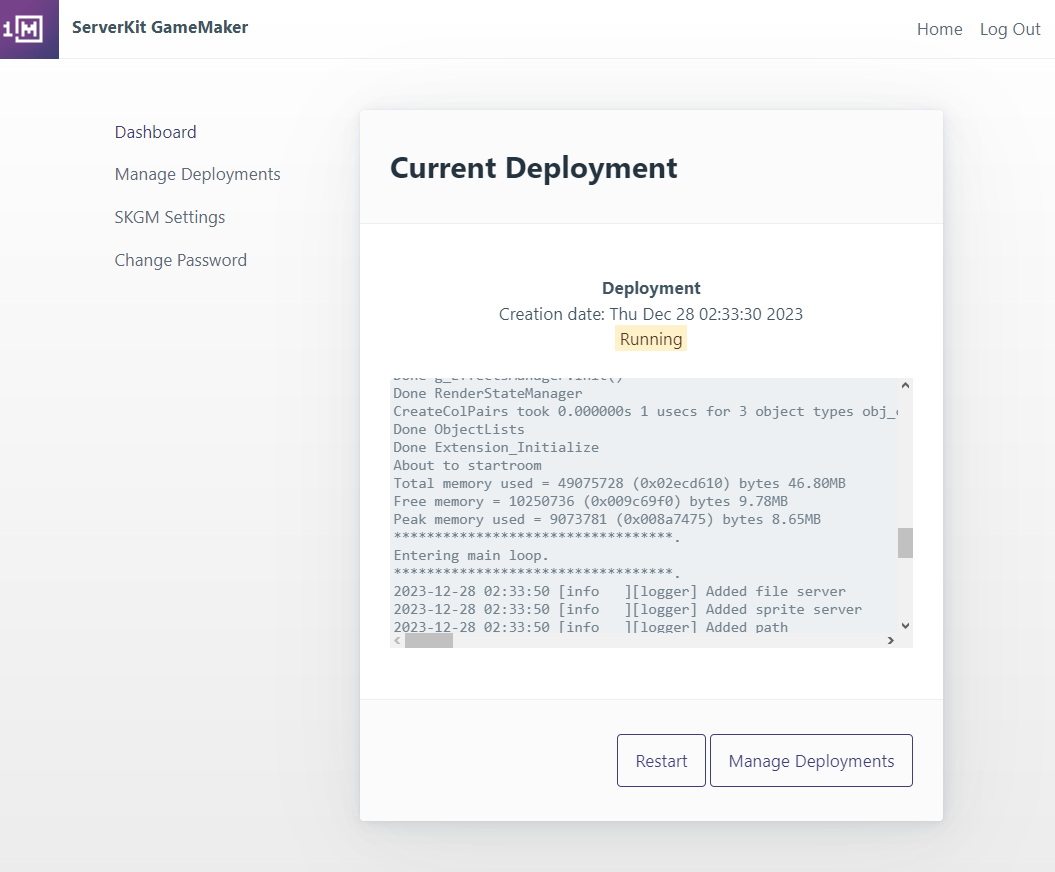
From here, you can see the streaming logs from your server, as well as restart your server.
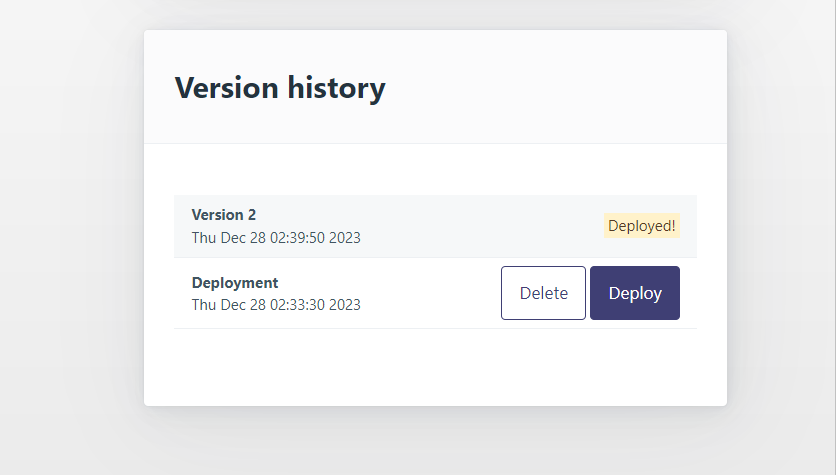
In the future, if you have a new version of the server, you can upload a new version in the Manage Deployments section. And if you need to roll back to a previous version, you can do it from there too, since the old version will show up in the Version history section
That's all there is to it. You can easily manage GameMaker servers this way.
Installing ServerKit GameMaker
There are several ways to install ServerKit GameMaker. Ultimately, it is itself a GameMaker game built for Ubuntu, and so running it is done in the same way as running any GameMaker program on Ubuntu.
However, for the purpose of this blog post, I'll walk through the easiest way to get started from zero, and is similar to what I outlined in this post, but rather than set up a server that can be used for both building and running, we'll set up a server that just does the running part (so it may be useful to have both, one for building and testing, one for hosting)
As with the previous post, this method will be using Digital Ocean as the VPS, and at the time of writing, this will run you a cost of about $4/mo - $6/mo.
Setting up the server
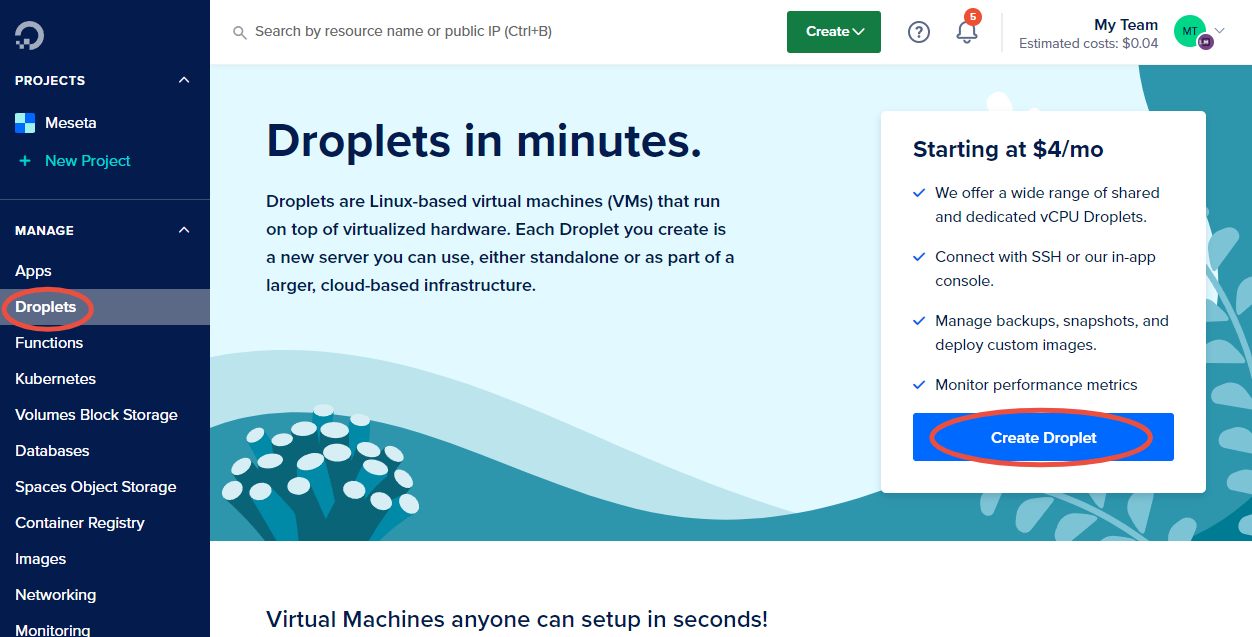
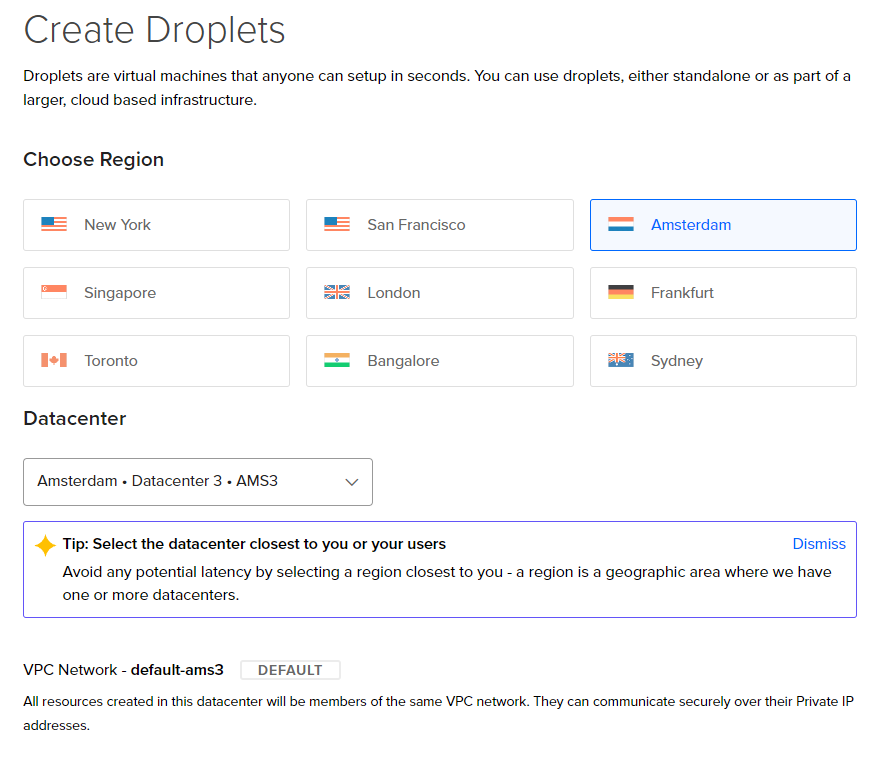
Exactly like the previous post, after you register for an account, go to Droplets and click Create Droplet.
In the next screen, in the Choose Region, select whichever region makes most sense for you. Servers in different regions affect the ping between the server and users. If servers are far away, then the ping is higher. Also note: some regions don't have the cheapest $4/mo tier available. So click around.
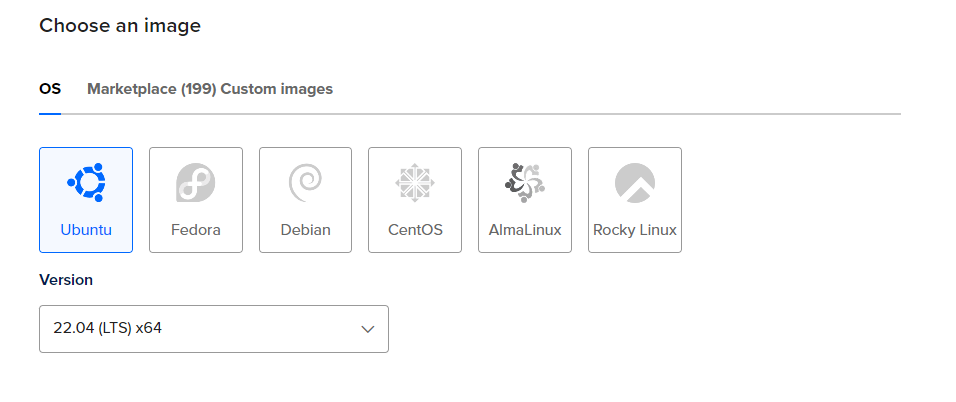
In the next Choose an image section, pick Ubuntu, and, unlike the previous post, this time let's pick 22.04 (LTS) x64. The reason for this is it's a slightly newer version, and this time I made sure my setup script supports this version.
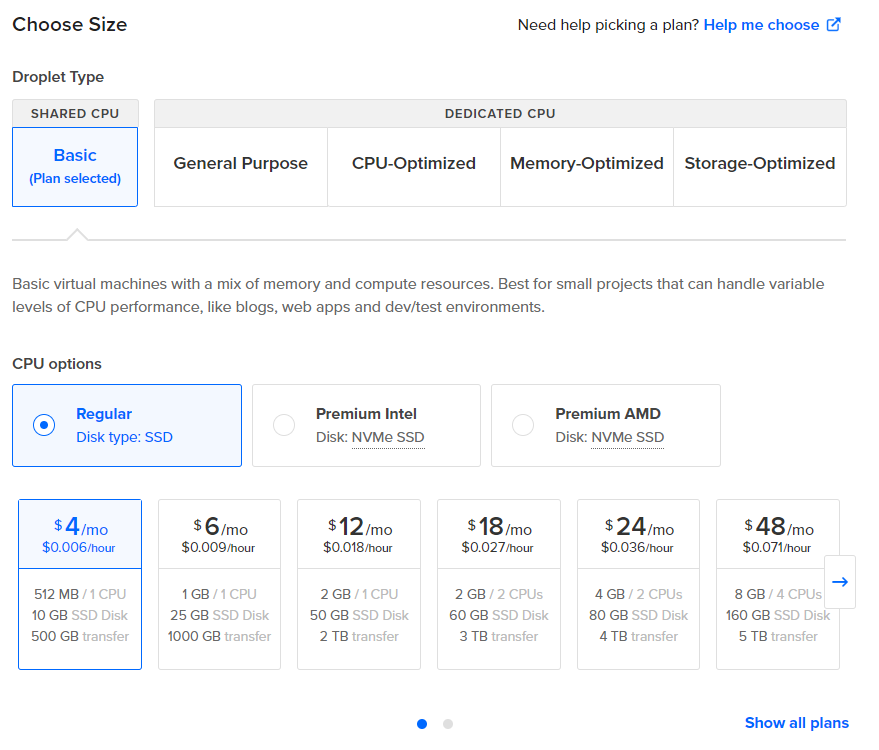
As with in the other post, in the Choose Size section, select the size of machine you want. The cheapest $4/mo option in the Regular section more or less works, but there's some risk that you will run out of RAM, and it'll cause things to just crash. $6/mo is safer. NOTE: if you don't see the $4/mo option, click on the left arrow button in the list, or select a different region.
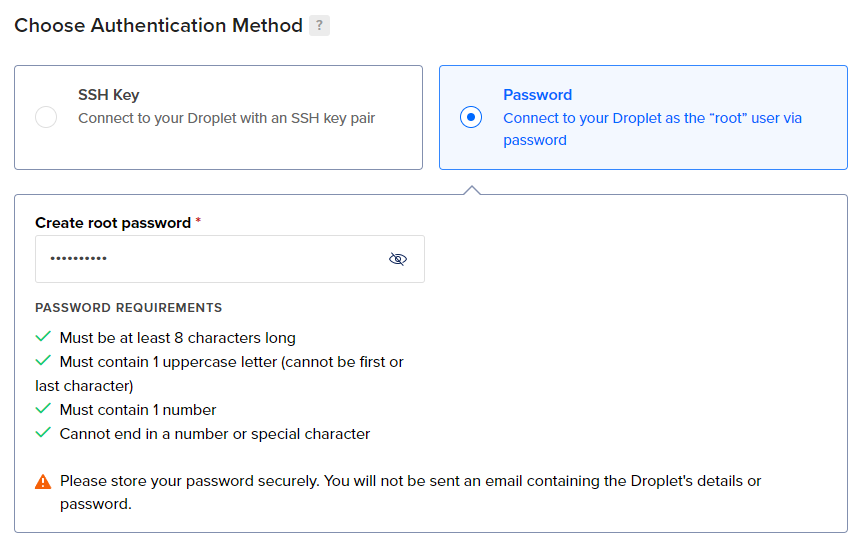
In the next Choose Authentication Method, pick either option. I suggest you create an SSH Key as it's more secure, but also the Password option is fine. In the previous post, I suggested using Password as that is what GameMaker IDE supports, but in this case, either option is fine. Using SKGM, you usually don't have to ever log into the machine, and the full setup can be done without ever doing that.
In the next section, expand the Advanced Options section, and select Enable IPv6, and Add Initialization scripts. This last point is the biggest difference between the previous post and this one.
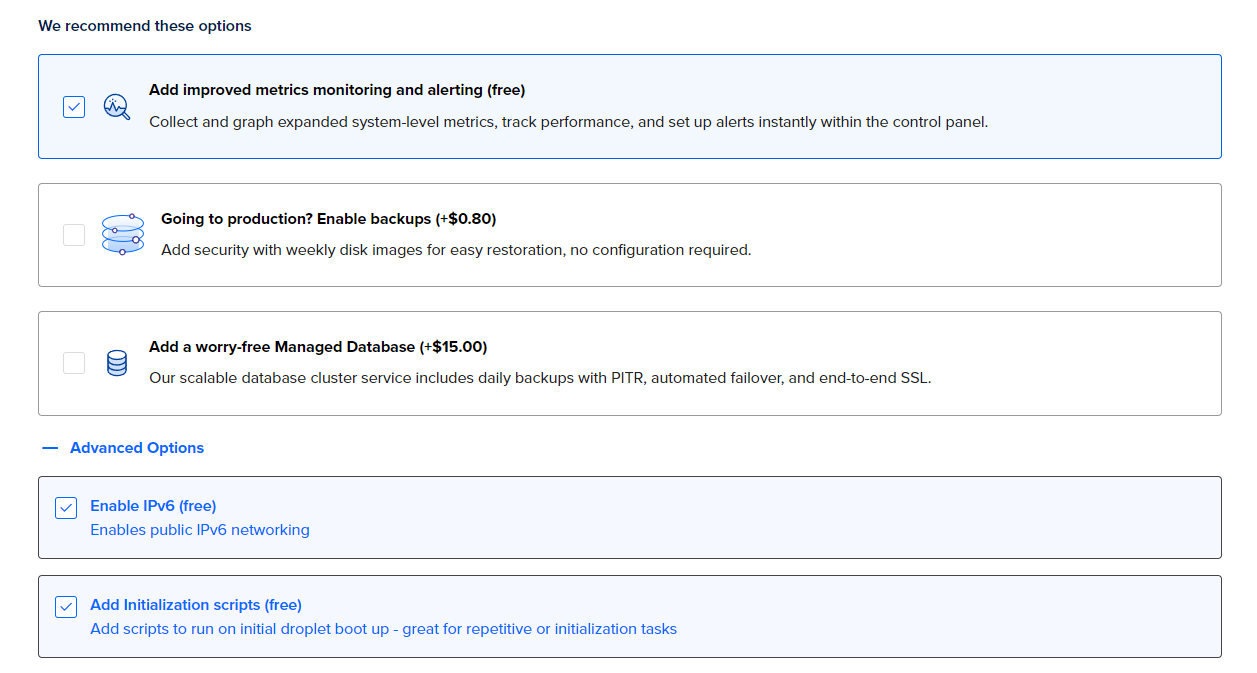
With the Add Initialization scripts selected, you will see a big textbox, where you can paste the below script.
Note: where it downloads SKGM in the script below, the line which reads curl -L https://github.com/meseta/skgm/releases/download/v1.1.1/skgm.AppImage -o /usr/local/bin/skgm.AppImage. This downloads v1.1.1, but you should check if there is a newer version of it, and edit the version number in the script accordingly to get the latest version.
#!/bin/bash

apt-get update
apt-get install --no-install-recommends --yes \
  curl \
  ca-certificates \
  gpg \
  gpg-agent \
  dirmngr

# Check if deb is in sources.list
echo "deb http://security.ubuntu.com/ubuntu xenial-security main" > /etc/apt/sources.list.d/xenial-security.list
echo "deb http://security.ubuntu.com/ubuntu focal-security main" > /etc/apt/sources.list.d/focal-security.list
gpg --keyserver hkp://keyserver.ubuntu.com:80 --recv-keys 40976EAF437D05B5 3B4FE6ACC0B21F32
gpg --export 40976EAF437D05B5 3B4FE6ACC0B21F32 >/etc/apt/trusted.gpg.d/security.ubuntu.com.gpg

apt-get update
apt-get install --no-install-recommends --yes \
  libxxf86vm1 \
  libgl1 \
  libssl1.1 \
  libxrandr2 \
  libglu1-mesa \
  libcurl4 \
  libopenal1 \
  xvfb \
  libssl1.0.0 \
  libcurl3-gnutls \
  lsb-release \
  nginx

# downlaod SKGM
mkdir -p /usr/local/bin
curl -L https://github.com/meseta/skgm/releases/download/v1.1.1/skgm.AppImage -o /usr/local/bin/skgm.AppImage
chmod +x /usr/local/bin/skgm.AppImage

# add unpriviledged user
adduser --disabled-password --gecos "" skgm
usermod -L skgm

# install the fake display startup scripts
cat >/etc/systemd/system/gamemaker-fake-display.service <<EOF
[Unit]
Description=GameMaker Fake Display

[Service]
Restart=on-failure
ExecStart=Xvfb :0 -screen 0 400x400x24

[Install]
WantedBy=default.target
EOF

# SKGM
cat >/etc/systemd/system/skgm.service <<EOF
[Unit]
Description=SeverKit GameMaker
Requires=gamemaker-fake-display

StartLimitBurst=5
StartLimitIntervalSec=30

[Service]
Restart=on-failure
Environment="DISPLAY=:0"
Environment="SKGM_PORT=5001"
ExecStart=/usr/local/bin/skgm.AppImage --appimage-extract-and-run
User=skgm
Group=skgm

[Install]
WantedBy=default.target
EOF

chmod 664 /etc/systemd/system/gamemaker-fake-display.service
chmod 664 /etc/systemd/system/skgm.service

systemctl daemon-reload
systemctl enable gamemaker-fake-display
systemctl enable skgm
systemctl start gamemaker-fake-display
systemctl start skgm

# self-signed certificate and nginx reverse proxy
openssl req -x509 -nodes -days 3650 -newkey rsa:2048 -keyout /etc/ssl/private/nginx-selfsigned.key -out /etc/ssl/certs/nginx-selfsigned.crt  -subj "/C=US/ST=New York/L=New York City/O=Internet/OU=./CN=./emailAddress=."

cat >/etc/nginx/sites-enabled/gamemaker-5000.conf <<'EOF'
server {
  listen 443 ssl;
  ssl_certificate /etc/ssl/certs/nginx-selfsigned.crt;
  ssl_certificate_key /etc/ssl/private/nginx-selfsigned.key;
  location / {
    proxy_set_header Host $host;
    proxy_set_header Upgrade $http_upgrade;
    proxy_set_header Connection $http_connection;
    proxy_set_header X-Real-IP $remote_addr;
    proxy_http_version 1.1;
    proxy_pass http://127.0.0.1:5000;
  }
}
server {
  listen 8443 ssl;
  ssl_certificate /etc/ssl/certs/nginx-selfsigned.crt;
  ssl_certificate_key /etc/ssl/private/nginx-selfsigned.key;
  client_max_body_size 100M;
  location / {
    proxy_set_header Host $host;
    proxy_set_header Upgrade $http_upgrade;
    proxy_set_header Connection $http_connection;
    proxy_set_header X-Real-IP $remote_addr;
    proxy_http_version 1.1;
    proxy_pass http://127.0.0.1:5001;
  }
}
EOF

rm /etc/nginx/sites-enabled/default
systemctl restart nginx
Here's the same script in a Gist:
 262588213843476
This script installs all the dependencies for running GameMaker games; it downloads and installs SKGM as a system service; and it also installs nginx to act as a reverse proxy. This uses a self-signed certificate for now, but you can put Cloudflare in front of it.
With all these filled, click Create Droplet, and wait about 10 minutes for it to spin up.
Firewall Setup
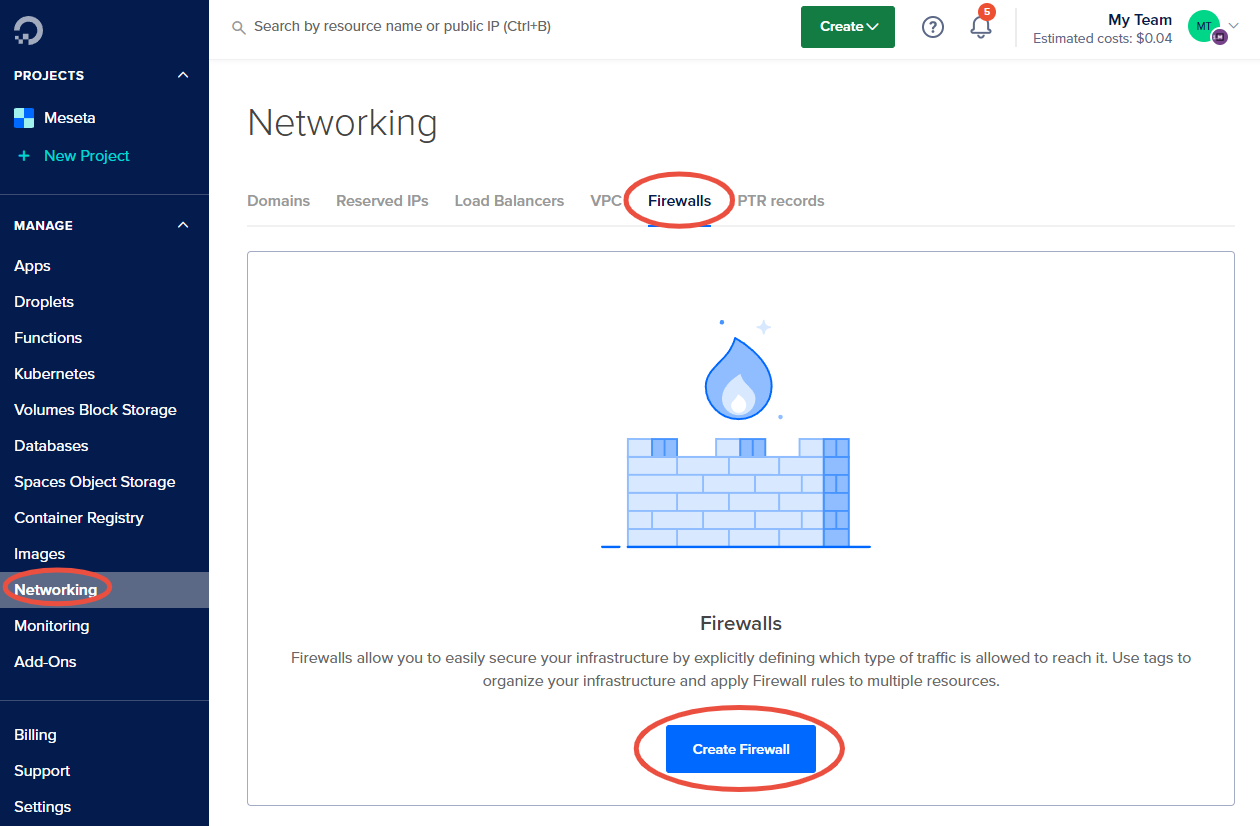
As with before, a firewall is good to have, and you can set this up while you wait for the droplet to spin up. Click on the Networking section in the sidebar, then Firewalls tab, and then Create Firewall
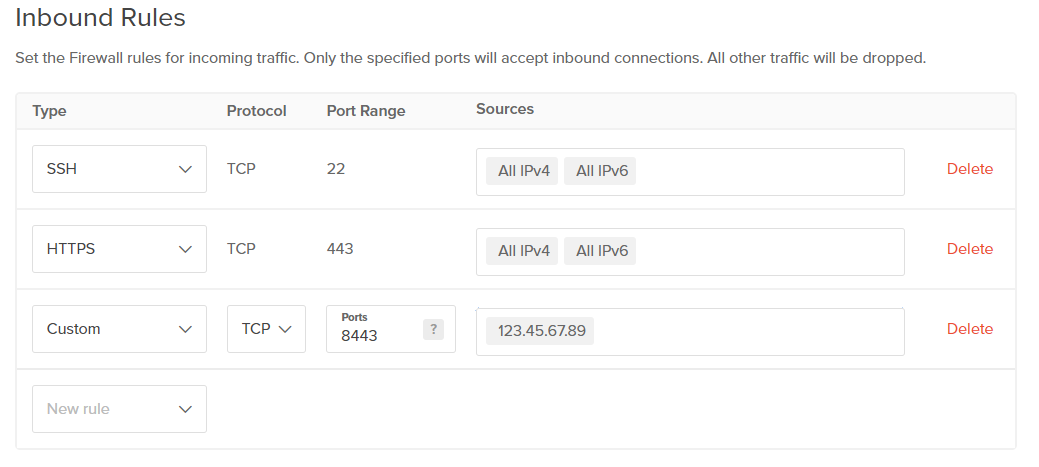
This time, the firewall is a bit different as we need to add port 8443 for the SKGM admin console. For extra security, you could change the Sources for that port to your own IP address, which will prevent anyone else outside from accessing the admin console. This is desirable, since if someone breaks in, they would potentially be able to run whatever they want on your server.
In the below screenshot, I've selected to add HTTPS on port 443 since in my case, I will be running a website on that port. You may want to enable the ports that you use for your game. And I've added the needed port 8443 for SKGM, 123.45.67.89 is an example IP address for the purpose of this screenshot, you'd put your own IP in there.
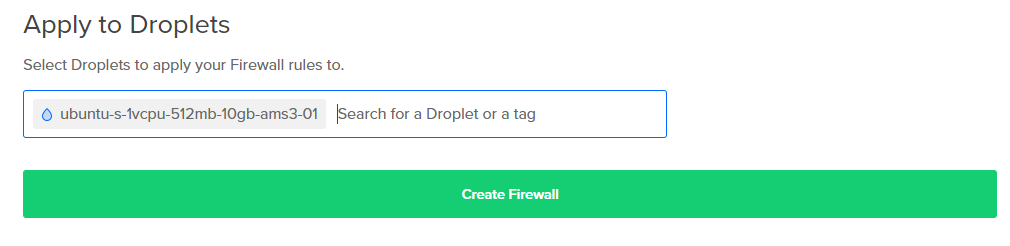
At the bottom of the page, in the Apply to Droplets section, type the name of the droplet you just created, to apply the firewall to it
At this point, you can set up a reserved IP address for your droplet as well. I cover that in my other post.
Setting up SKGM
Once your droplet is up and running, the first thing you must do is open up SKGM's web UI and set an admin password. If you don't do this, someone else visiting your server will be able to do it.
To go to the web UI, get the IP address of your Droplet.
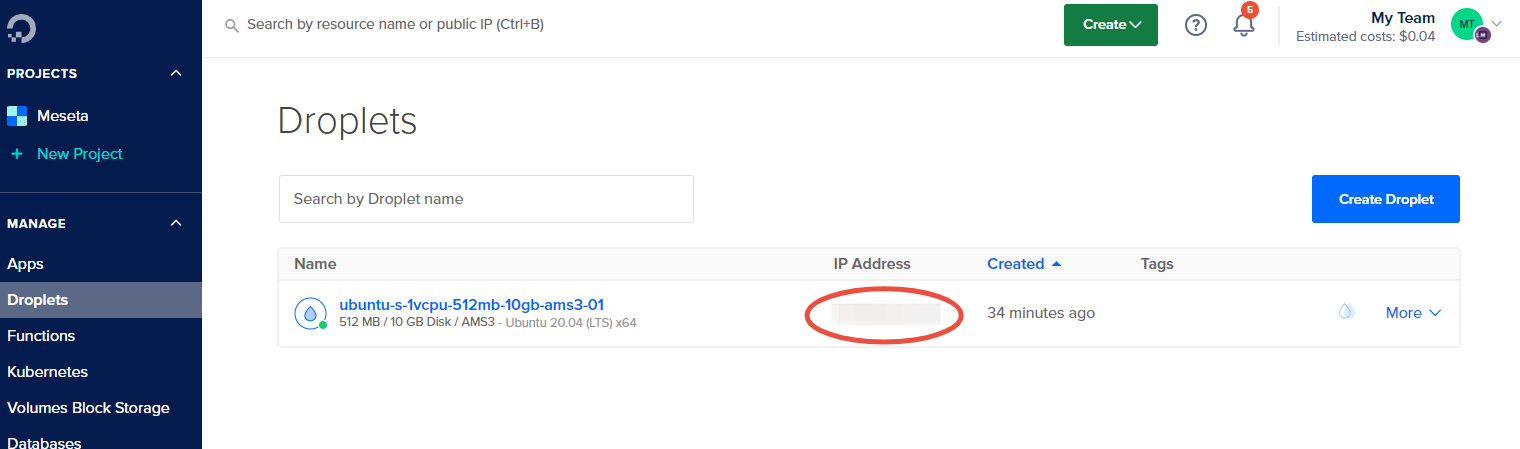
And put it into the URL of your browser, adding port 8443, which is the port where SKGM's web UI is hosted: https://xx.yy.zz.ww:8443. You will see this, but don't panic!
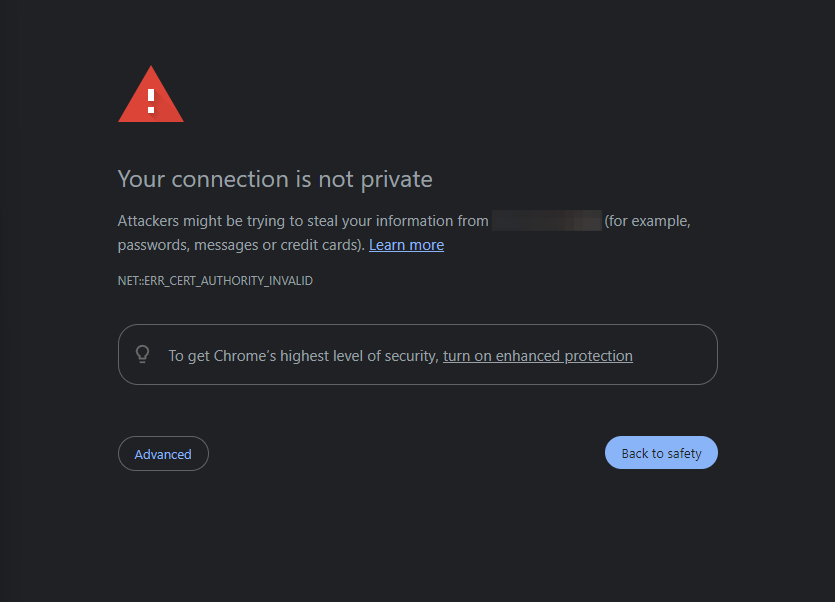
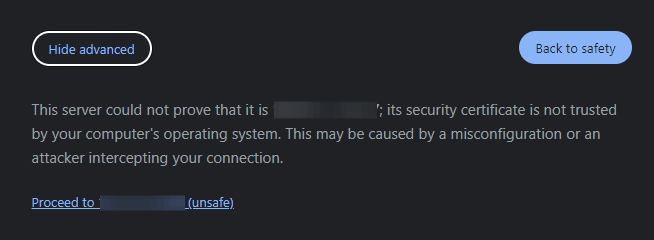
The reason you're seeing this is because the setup uses a self-signed certificate, which the browser does not trust. To get rid of this, you would need to set up a proper domain name, and provisioning a proper certificate (or by using CloudFlare in front of your installation). But for now, we have to live with using a self-signed certificate, and seeing this sometimes.
Click Advanced, and then Proceed to xx.yy.zz.ww (unsafe)
Once you do this, you will see the password setup screen, and you can follow the steps outlined at the start of this post!
Congratulations, you've set up a SKGM managed server, and can now easily upload and deploy new versions of your gamemaker server straight from a web browser. I'll be covering how to set up a domain name so that you don't have to see the "Your connection is not private" message all the time in a future post.