HyperText GameMaker: Make Websites in GameMaker

If you cut through the crap on the internet about what is and isn't web development, and whether HTML is or isn't a programming language, the core of it is that a website is pretty much something your browser can talk to a server for and receive HTML, with varying amounts of JavaScript to spice things up. For more complex dynamic websites (the ones that can change their content rather than just being static pages, like blogs, games, and web apps), the server had the option of deciding exactly what HTML to give to you, and/or the JavaScript that is loaded into the browser may be doing that. Either way, eventually the HTML gets changed in order to show you something different.
Back in the early 2000s, our main way of doing this was called server-side scripting. Back then, PHP had just exploded on the scene, and was rapidly dominating the internet, a position it keeps even today. Back then, the way PHP worked was it was simply a program that the web server (usually Apache) called in order to handle a request from the browser. Your PHP code would run, and it would literally print out the HTML. You could change your page by changing what PHP printed, literally with if statements to change what was printed. Apache would take this printout and send it back to the user's browser.
Somewhere in the mid 2010s, JavaScript SPAs got popular (stuff like React). These worked slightly differently in that they didn't rely on the server printing HTML. Instead, a simple page would be loaded, and once the page loaded, JavaScript in the browser would run, and dynamically change what the user was seeing in real-time. Sometimes fetching bits of JSON from a server, to decide what to display.
These days, the pendulum is swinging the other way again, with things like JavaScript starting to use more SSR (server-side rendering), where the server is once again being asked to print out some HTML to send to the browser, where it's incorporated in to the page.
What does this history have to do with making websites in GameMaker? Well, what's stopping us from outputting HTLM from GameMaker, just as PHP did all those years ago? What's stopping us from incorporating SSR-like abilities of rendering little bits of HTML at a time to send to the browser? Nothing. Nothing at all. GameMaker can be made to do this, and can become a webserver too. I decided to explore that route recently to come up with what I call HyperText GameMaker, a GML framework that enables you to make webservers and website directly using GML.
This article is aimed at intermediate GameMaker devs, and ideally developers who already have some experience in (or willingness to learn) HTML, since we can't escape the need to write HTML, who want to dabble in making websites, either to be used from the web OR as a component of their game. Follow along to make your first website in GameMaker.
Download and install the Library
First step is to grab the library, the official website is here (where you may find some additional usage guides):


The downloads are here on the GitHub
 meseta
Download the dev.meseta.htgm.yymps package, this is a GameMaker local package, and can be imported into a new project from the Tools > Import Local Package menu.
The library comes with a lot of ... stuff, but don't worry about it too much, it needs most of those things to work correctly. You may occasionally get a conflict with well-known libraries like SnowState which the library uses internally, or my other Logger and Sentry libraries (hopefully the new package management stuff GameMaker are working on will solve this).
Create your first website
Find an object that you will use to hold the setup and start of your website. You can also forgo an object entirely and use a global, it actually doesn't matter too much, it's up to you, as long as server.start() runs the game enters the first room.
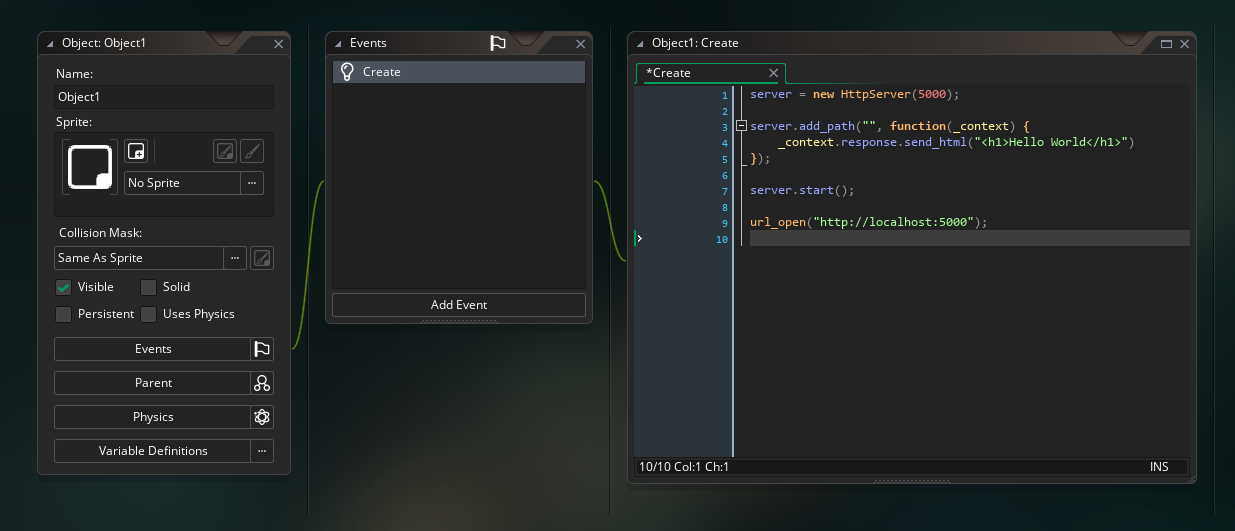
server = new HttpServer(5000);

server.add_path("", function(_context) {
	_context.response.send_html("<h1>Hello World</h1>")
});

server.start();

url_open("http://localhost:5000");
Why does server.start() have to run after entering the first room?
This is due to how GameMaker's startup process works. As you may know, putting any code in a script file and outside the scope of any function() allows you define globals and stuff. However, all this stuff happens before we enter the first room, which means you can't spawn any objects. It'll just fail.
Because objects with async-networking events are the only way to make TCP servers currently, the HTGM library has to spawn an object when you run server.start() that has an async-networking event in it. It can't do that until the game has entered the first room.
Personally, I actually create the server as a global variable in one of the scripts, and put server.start() in a call_later to run a frame later. Saves having to use objects for it.
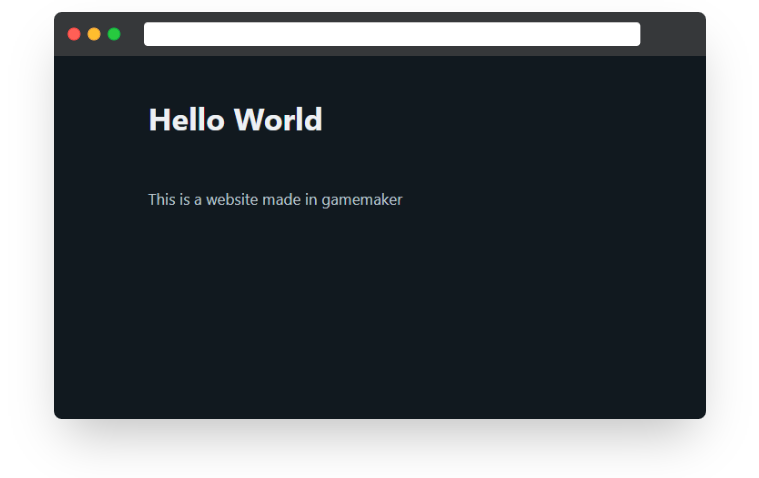
Once you hit run, your browser will pop up, and hopefully you'll see the page:
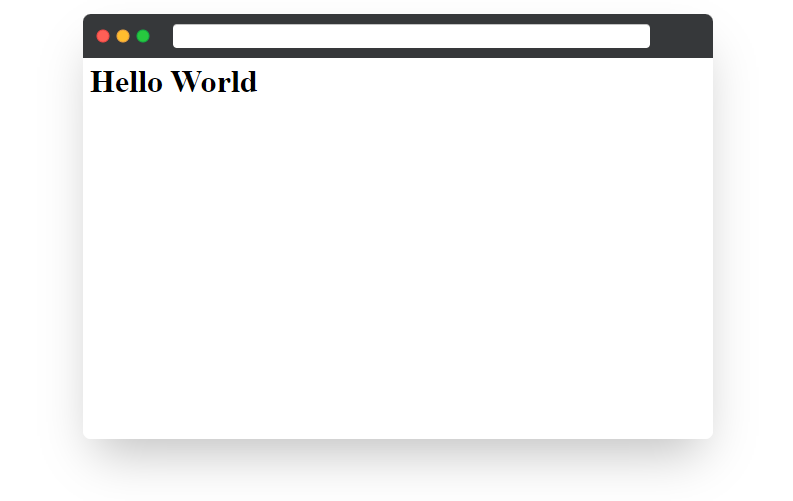
Congratulations, you've just made your first "website". At this point, if for some reason you wanted to host this on a server, I have a little guide for it here:

Using a Render constructor
For a more complex website, we're going to want to use HTGM's support for using constructors to render pages instead of the bare-bones basic add_path() method (you can read more about these things in the usage guide).
So let's create a new constructor that will output a proper HTML page instead of just <h1>Hello World</h1>
Create a new script called ViewIndex, with the following:
function ViewIndex(): HttpServerRenderBase() constructor {
	// View setup
	static path = "";

	// Static properties
	static title = "My GameMaker Website";
	static content1 = "<h1>Hello World</h1>";
	static content2 = "<p>This is a website made in gamemaker</p>";

	static render = function(_context) {
		return @'
			<!DOCTYPE html>
			<html lang="en">
			<head>
				<meta charset="utf-8">
				<meta name="viewport" content="width=device-width, initial-scale=1">
				<title>'+ self.title + @'</title>
			</head>
			<body>
				'+ self.content1 + @'
				'+ self.content2 + @'
			</body>
			</html>
		';
	}
}
The big string above is what a more fleshed out HTML page looks like. Plus, we're having GML insert various things using variables.
Then update your server code to the following (we're replacing the add_path() with add_render() to tell the server we want to use ViewIndex in the server.
server = new HttpServer(5000);
server.add_render(ViewIndex);
server.start();
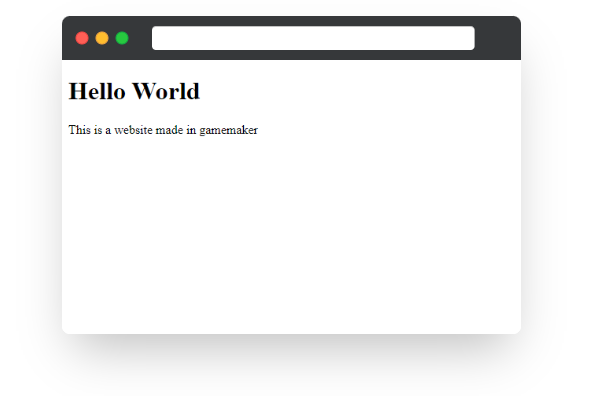
url_open("http://localhost:5000");If you run the game again, you'll see mostly the same thing as before, but now we're set up to extend this a lot more.
Adding CSS
A blank page doesn't look very good, we need to add some style. In steps CSS. I won't go into the specifics of how CSS and HTML work together, but here's the example of how you can use it.
In this example, instead of writing extensive CSS myself, I'm going to pick the nice and lightweight CSS library Pico.CSS, which gives us a bunch of pre-written stuff. It's actually what I'm using for the main HTGM website itself, so you'll be able to see some similarity.
If you go to the Pico.CSS's docs page and see the "Usage" section, it'll explain how to install it:

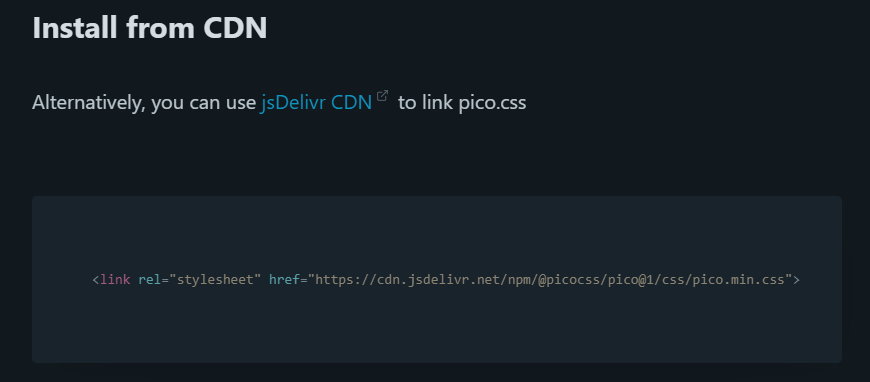
The above is a screenshot from their documentation page for how to install it. We're going to use this "Install from CDN" part, since loading it from CDN is the fastest way to do it.
So, we edit ViewIndex() and change it to the following, we're just adding that <link> tag, plus putting the contents inside a <main> tag.
function ViewIndex(): HttpServerRenderBase() constructor {
	// View setup
	static path = "";

	// Static properties
	static title = "My GameMaker Website";
	static content1 = "<h1>Hello World</h1>";
	static content2 = "<p>This is a website made in gamemaker</p>";

	static render = function(_context) {
		return @'
			<!DOCTYPE html>
			<html lang="en">
			<head>
				<meta charset="utf-8">
				<meta name="viewport" content="width=device-width, initial-scale=1">
				<title>'+ self.title + @'</title>

				<link rel="stylesheet" href="https://cdn.jsdelivr.net/npm/@picocss/pico@1/css/pico.min.css">
			</head>
			<body>
				<main class="container">
					'+ self.content1 + @'
					'+ self.content2 + @'
				</main>
			</body>
			</html>
		';
	}
}
Now, when we run the project, we get a much nicer-looking website. Even if it's just a title and some text, the CSS library has given us a colors-cheme, font selection, and a bit of extra control over the layout. So even a basic website as this starts looking more professional.
Adding nested pages
While we could just duplicate this page multiple times, that makes the website much harder to maintain, because if we wanted to change the design a little, we'd have to update it on every page. Instead, we can use ViewIndex as a template page, and have it load the other pages into it (this method is described in the usage guide).
So, let's create a couple of content pages:
function ViewMain(): HttpServerRenderBase() constructor {
	// View setup
	static path = "main";
	static redirect_path = "";

	static render = function(_context) {
		return @'
			<h1>Welcome</h1>
			<p>
				Welcome to my website made in GameMaker!
			</p>
		';
	}
}
function ViewAbout(): HttpServerRenderBase() constructor {
// View setup
static path = "about";
static redirect_path = "";
static render = function(_context) {
return quote_fix(@'
<h1>About Me</h1>
<p>
Hi, I`m a gamedev who is making a website using GameMaker
</p>
');
}
}As you can see, both of these views are very simple, and contain just the HTML for the content they're responsible for. Also note the inclusion of redirect_path. This tells HTGM that any request for this site should internally redirect to the root path, which is an empty string (the path provided by ViewIndex) since we want ViewIndex to render the template page first.
Then, in ViewIndex, we want to update it to use the render functions from the constructors that we redirected from, to incorporate their render into the index template:
function ViewIndex(): HttpServerRenderBase() constructor {
	// View setup
	static path = "";

	// Static properties
	static title = "My GameMaker Website";

	static render = function(_context) {
		var _render = _context.pop_render_stack();
		var _content = is_method(_render) ? _render(_context) : ViewMain.render(_context);

		return @'
			<!DOCTYPE html>
			<html lang="en">
			<head>
				<meta charset="utf-8">
				<meta name="viewport" content="width=device-width, initial-scale=1">
				<title>'+ self.title + @'</title>

				<link rel="stylesheet" href="https://cdn.jsdelivr.net/npm/@picocss/pico@1/css/pico.min.css">
			</head>
			<body>
				<main class="container">
					'+ _content +@'
				</main>
			</body>
			</html>
		';
	}
}
Finally, don't forget to update your server object, to register these new views:
server = new HttpServer(5000);

server.add_render(ViewAbout);
server.add_render(ViewMain);
server.add_render(ViewIndex);
server.start();

url_open("http://localhost:5000");
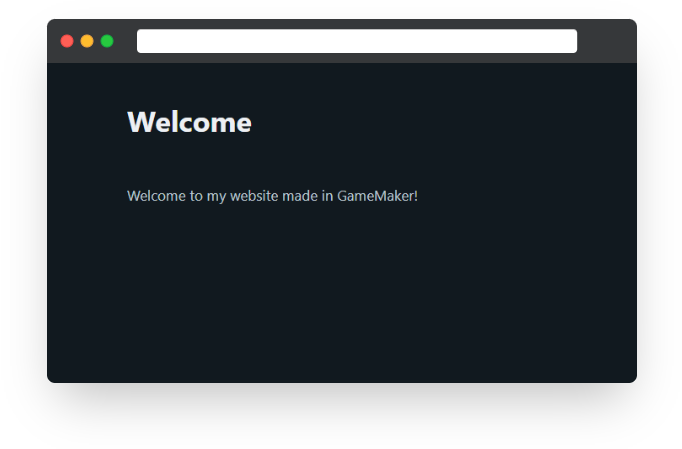
When you run the project now, you'll be able to see the main page has been updated to make use of the content on ViewMain:
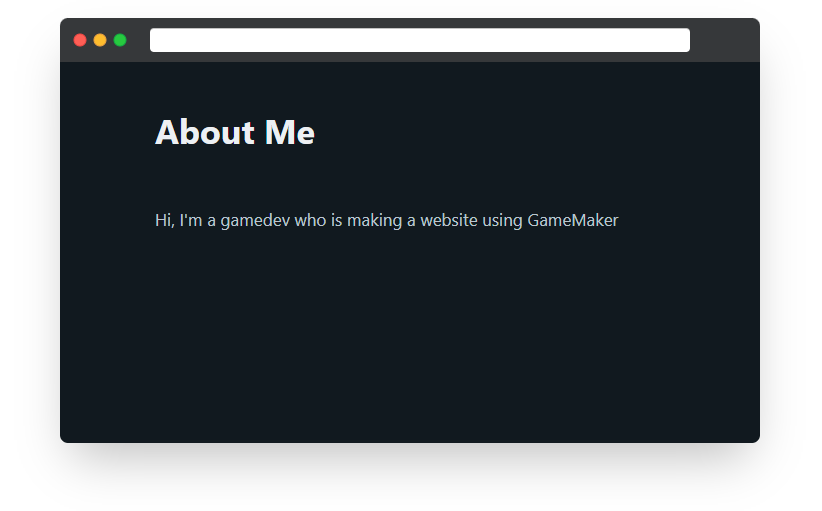
But also, if you navigate to http://localhost:5000/about, you'll now see the contents of ViewAbout incorporated into ViewIndex
Adding a Navigation Bar
Now that we have more than one page, we need a navigation bar at the top of the screen to add links.
To stay with the theme of re-usable components (more info on that in the usage guide), we're going to create a navigation bar component, as well as individual components for each nav link. The reason for this is to make it really easy to edit the links - you can edit just the one component rather than have to edit lots of individually copy/pasted ones.
function ComponentNavigation(): HtmlComponent() constructor {
	static render = function(_context) {
		static _links = [
			new ComponentNavigationLink(ViewMain.path, "Home"),
			new ComponentNavigationLink(ViewAbout.path, "About"),
		];

		return @'
			<nav class="container-fluid">
				<ul>
					<li><strong>My Website</strong></li>
				</ul>
				<ul>
					'+ HtmlComponent.render_array(_links, "", _context) + @'
				</ul>
			</nav>
		';
	};
}

function ComponentNavigationLink(_path, _text): HtmlComponent() constructor {
	self.path = _path;
	self.text = _text;

	static render = function(_context) {
		return $"<li><a href='{self.path}'>{self.text}</a></li>";
	}
}
As you can see, I've added a static array of ComponentNavigationLink, instantiating each using the path property of their respective views (this is, by the way, why those variables were statics). We could, instead have just written "about" and "main" instead of ViewAbout.path and ViewMain.path, but this is just easier to maintain.
Note: now we're inheriting from HtmlComponent() instead of HttpServerRenderbase() The reason for this is HtmlComponent() just contains some lightweight functions to make your life easier when making components, whereas HttpServerRenderBase() has a bunch of internal methods used by the server to figure out how to render your page.
The navigation component can be used inside the ViewIndex:
function ViewIndex(): HttpServerRenderBase() constructor {
// View setup
static path = "";
// Static properties
static title = "My GameMaker Website";
static render = function(_context) {
static _navigation = new ComponentNavigation();
var _render = _context.pop_render_stack();
var _content = is_method(_render) ? _render(_context) : ViewMain.render(_context);
return @'
<!DOCTYPE html>
<html lang="en">
<head>
<meta charset="utf-8">
<meta name="viewport" content="width=device-width, initial-scale=1">
<title>'+ self.title + @'</title>
<link rel="stylesheet" href="https://cdn.jsdelivr.net/npm/@picocss/pico@1/css/pico.min.css">
</head>
<body>
'+ _navigation.render(_context) + @'
<main class="container">
'+ _content +@'
</main>
</body>
</html>
';
}
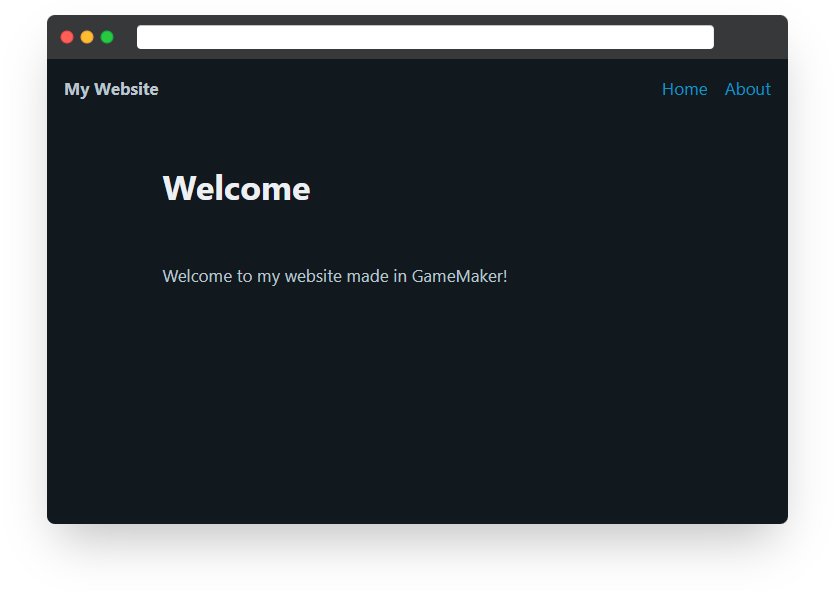
}Now, running the website, you'll be able to see the new navigation bar, with links you can click to get to the other pages!
This is as far as I'll go in this article. Hopefully you can see how you can create websites with GameMaker, making use of re-usable components. There's so much else that can be done from here, to make more complex websites, even whole web-apps. Take a look at the source code for the HTGM website itself on the git repo if you're looking for more complete examples. And if you want to throw this on the internet, rather than run from your computer all the time, you'll need to put this "game" on a server. I have a post for that here.