GameMaker Servers in the Cloud

I'm going to be blogging a lot about running GameMaker on the server. I personally do a lot of builds using a CI/CD system that automatically makes and deploys GameMaker linux builds when making a git push, however this takes a bit of setup, so I want to provide some simpler methods.
In this article, I'll share with you the quickest way I've figured out to build and host GameMaker servers. It's not the most polished way, it's not the cheapest, and it's not ideal for long-term hosting, however it is the fastest way to get started, requiring the least amount of learning new things.
Note: I will be using Digital Ocean as the VPS solution, which at the time of writing will run you a cost of about $4/mo - $6/mo.
What are we doing?
We're going to set up your own always-on cloud server, which will serve as both the remote builder and the server on which to run a single GameMaker server, and we're going to do it in a way which requires only the use of a browser, and the GameMaker IDE itself. No need to learn any new languages, no need to install new software, no need to leave your own computer running all the time.
GameMaker is capable of running on Linux, this is ideal for running as a server. But if you're running Windows on your desktop, GameMaker IDE needs to connect to a linux machine in order to do the build. So, we will make a server that GameMaker IDE can connect to to run the build. And then we will use the same server to host and run the built app, two birds with one stone!
The "server" I am referring to will be a VPS. Or in other words, one that you "rent" and pay for by the hour as an online service. You can easily turn it on and off though, so it's good to experiment with and there aren't any hassles cancelling it. The service I have chosen is Digital Ocean, which, in my opinion, has one of the easiest-to-use services out there, and the prices are very reasonable and there are few surprises.
Setting up the server
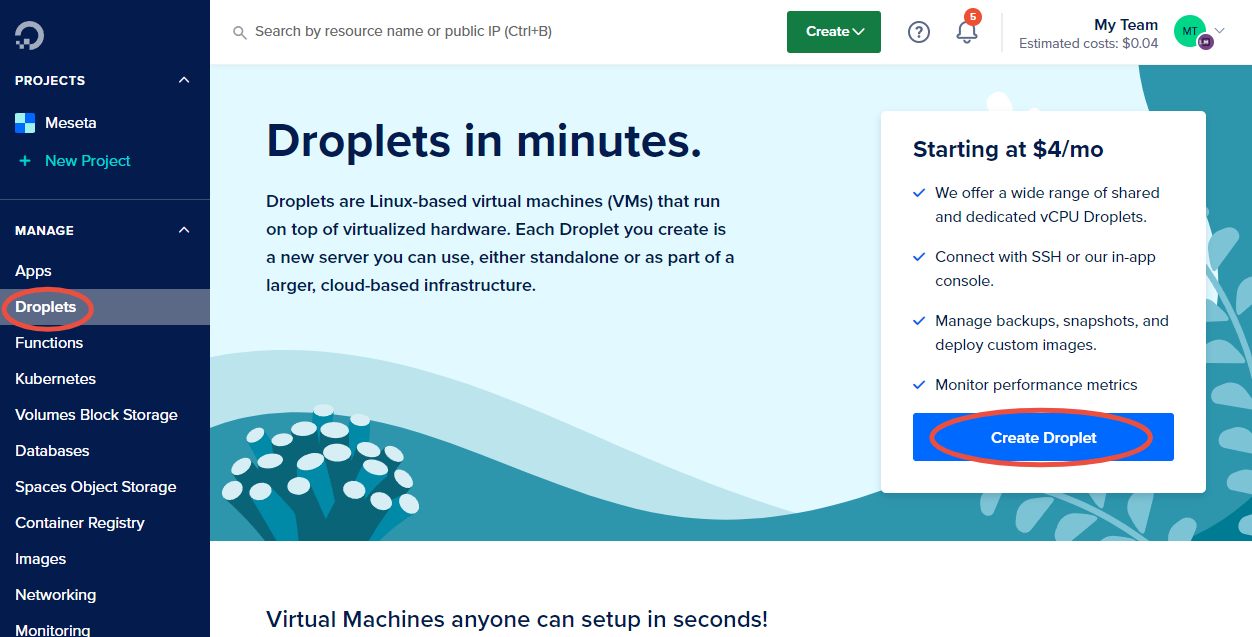
After you register for an account, go to Droplets and click Create Droplet. "Droplets" are what Digital Ocean calls their normal servers. You may see the term "Virtual Machine", "Virtual Private Server", "Cloud Server", or "Cloud Instance" used mostly interchangeably.
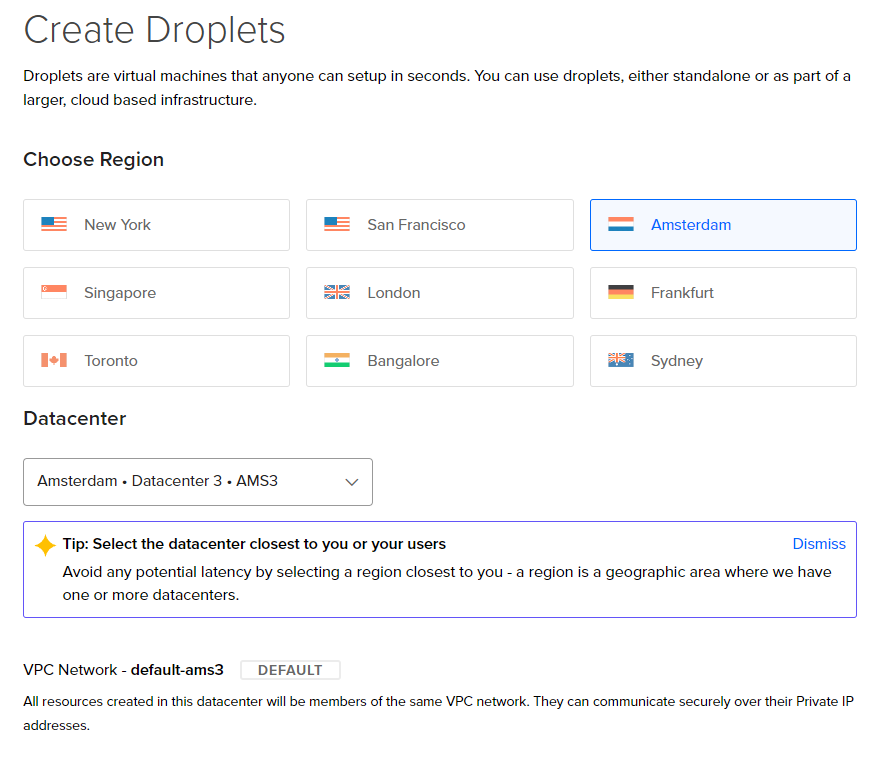
In the next screen is the Choose Region section. The region impacts the ping between the server and the users of the server. If the server is far away from the user, then ping is higher, this may matter if you're using the server as a game server. For example if you pick San Francisco, and the user is located in Europe, then you may expect pings in excess of 100ms. But a user in California may experience <10ms pings. Aside from this, some regions don't have the cheapest $4/mo tier.
The datacenter doesn't matter too much at this point.
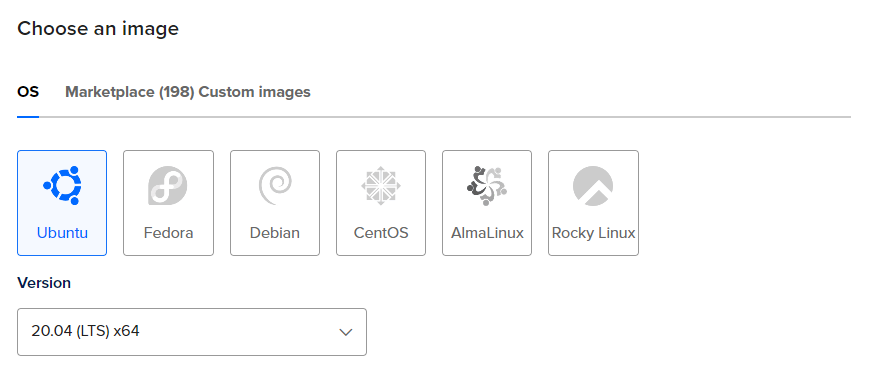
In the next Choose an image section, pick Ubuntu, and 20.04 (LTS) x64, this is the OS that you'll be using. GameMaker only officially supports Ubuntu, and my setup is only tested on 20.04, it might only need a little bit of tweaking to get working on newer versions though.
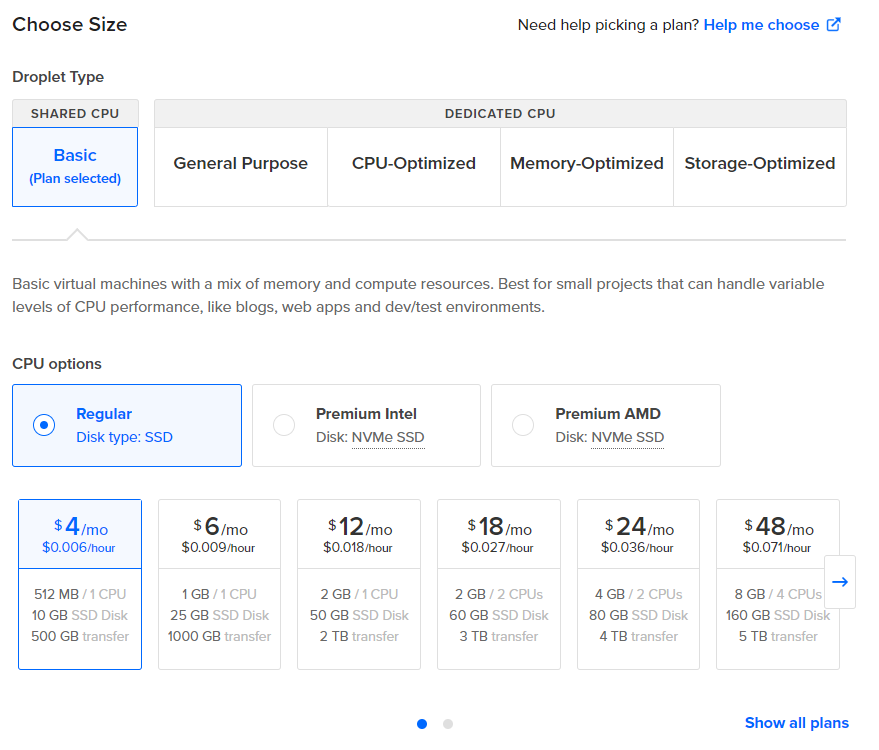
In the Choose Size section, select the size of machine you want. The cheapest $4/mo option in the Regular section more or less works, but there's some risk that you will run out of RAM, and it'll cause things to just crash. $6/mo is safer. If you have a bigger project, you may start needing the bigger machines. NOTE: if you don't see the $4/mo option, click on the left arrow button in the list, or select a different region.
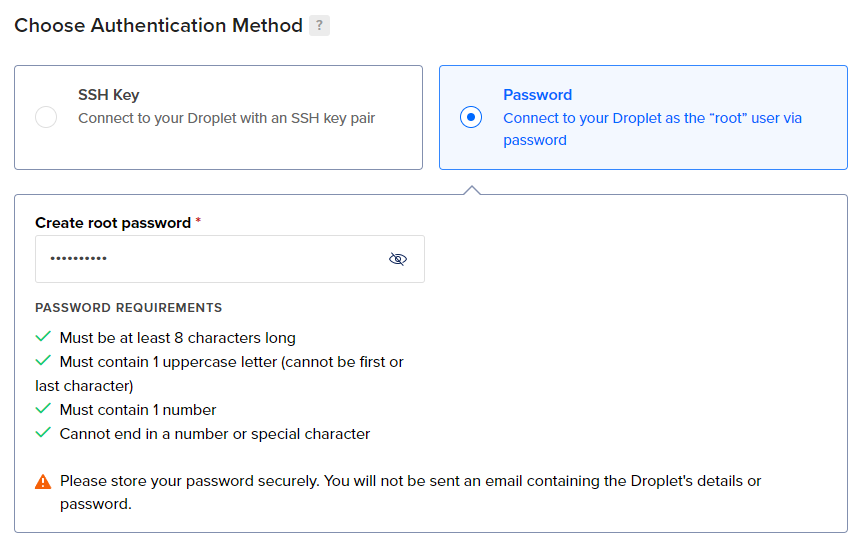
In the Choose Authentication Method section, switch to Password and create a password. This is necessary as GameMaker IDE wants to connect via password rather than SSH Key.
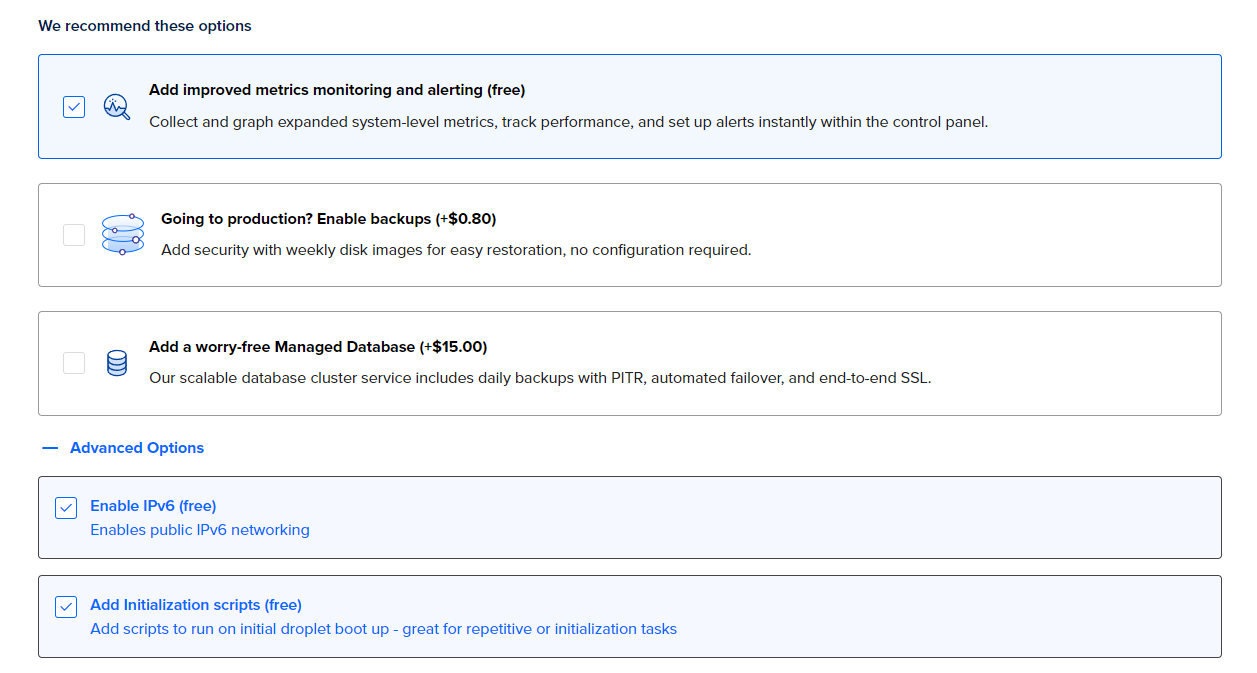
In the next section, expand the Advanced Options section, and select Enable IPv6, and Add Initialization scripts. This last point is very important, because this is where we will add code to set the server up properly to act as a GameMaker builder and runner. Without this, all we have is a bare-bones basic Linux server.
With the Add Initialization scripts selected, you will see a big textbox, where you can paste the below script
#!/bin/bash

# Check if deb is in sources.list
DEB="deb http://security.ubuntu.com/ubuntu xenial-security main"
grep "$DEB" /etc/apt/sources.list > /dev/null 2>&1
if [ $? -ne 0 ]; then
  echo "$DEB" >> /etc/apt/sources.list
fi

apt-get update && apt-get install --no-install-recommends --yes \
	curl \
	gnupg \
	ca-certificates \
	build-essential \
	clang \
	libssl-dev \
	libxrandr-dev \
	libxxf86vm-dev \
	libopenal-dev \
	libgl1-mesa-dev \
	libglu1-mesa-dev \
	zlib1g-dev \
	libcurl4-openssl-dev \
	mono-complete \
	zip \
	unzip \
	ffmpeg \
	rsync \
	git \
	libxxf86vm1 \
	libgl1 \
	libssl1.1 \
	libxrandr2 \
	libglu1-mesa \
	libcurl4 \
	libopenal1 \
	xvfb \
	libssl1.0.0 \
	libcurl3-gnutls \
	lsb-release \
	nginx

STEAMRUNTIME=/opt/steam-runtime/
if ! [ -d "$STEAMRUNTIME" ]; then
	mkdir $STEAMRUNTIME
	curl -Ls https://repo.steampowered.com/steamrt-images-scout/snapshots/latest-steam-client-general-availability/com.valvesoftware.SteamRuntime.Sdk-amd64,i386-scout-sysroot.tar.gz | tar -xzf - -C $STEAMRUNTIME
fi

LINUXDEPLOY=/usr/local/bin/linuxdeploy
if ! [ -f "$LINUXDEPLOY" ]; then
	curl -Ls https://github.com/linuxdeploy/linuxdeploy/releases/download/continuous/linuxdeploy-x86_64.AppImage -o linuxdeploy-x86_64.AppImage
	install -m 0755 linuxdeploy-x86_64.AppImage $LINUXDEPLOY
	rm linuxdeploy-x86_64.AppImage
fi

APPIMAGETOOL=/usr/local/bin/appimagetool
if ! [ -f "$APPIMAGETOOL" ]; then
	curl -Ls https://github.com/AppImage/AppImageKit/releases/download/continuous/appimagetool-x86_64.AppImage -o appimagetool-x86_64.AppImage
	install -m 0755 appimagetool-x86_64.AppImage $APPIMAGETOOL
	rm appimagetool-x86_64.AppImage
fi

# install the fake display startup script
cat >/etc/systemd/system/gamemaker-fake-display.service <<EOF
[Unit]
Description=GameMaker Server Stuff

[Service]
Environment="DISPLAY=:0"
ExecStart=Xvfb :0 -screen 0 400x400x24

[Install]
WantedBy=default.target
EOF

# process watcher to ensure no two AppRun are running
# this is needed as of IDE v2023.11.0.121 which won't shut down old AppRuns
cat >/usr/local/bin/gamemaker-process-watcher.sh <<'EOF'
#!/bin/bash
while sleep 1; do if [[ $(pgrep -f "AppRun -debugoutput" | wc -l) -gt 1 ]]; then pkill -f "AppRun -debugoutput"; fi; done
EOF

cat >/etc/systemd/system/gamemaker-process-watcher.service <<EOF
[Unit]
Description=GameMaker Server Stuff

[Service]
ExecStart=/usr/local/bin/gamemaker-process-watcher.sh

[Install]
WantedBy=default.target
EOF

chmod 744 /usr/local/bin/gamemaker-process-watcher.sh
chmod 664 /etc/systemd/system/gamemaker-process-watcher.service
chmod 664 /etc/systemd/system/gamemaker-fake-display.service

systemctl daemon-reload
systemctl enable gamemaker-process-watcher
systemctl enable gamemaker-fake-display
systemctl start gamemaker-process-watcher
systemctl start gamemaker-fake-display

# self-signed certificate and nginx reverse proxy
openssl req -x509 -nodes -days 3650 -newkey rsa:2048 -keyout /etc/ssl/private/nginx-selfsigned.key -out /etc/ssl/certs/nginx-selfsigned.crt  -subj "/C=US/ST=New York/L=New York City/O=Internet/OU=./CN=./emailAddress=."

cat >/etc/nginx/sites-enabled/gamemaker-5000.conf <<'EOF'
server {
  listen 443 ssl;

  ssl_certificate /etc/ssl/certs/nginx-selfsigned.crt;
  ssl_certificate_key /etc/ssl/private/nginx-selfsigned.key;

  location / {
    proxy_set_header Host $host;
    proxy_set_header Upgrade $http_upgrade;
    proxy_set_header Connection $http_connection;
    proxy_set_header X-Real-IP $remote_addr;
    proxy_http_version 1.1;
    proxy_pass http://127.0.0.1:5000;
  }
}
EOF

rm /etc/nginx/sites-enabled/default
systemctl restart nginx
Here's the same script in a Gist:
 262588213843476
This script installs all the required tools. Most of this stuff follows the official guidelines from the help center. Except for the last few lines which are needed to get around a weird quirk/bug which is actually useful for us, which I'll talk about in a sec; and also add a self-signed TLS-terminating proxy which we'll use later to connect Cloudflare to, and also serve WSS from.
Once these are all filled, click Create Droplet, and wait about 10 minutes for it to spin up, and install all the needed stuff. You'll be able to tell when this installation is complete when the CPU usage falls.
Firewall Setup
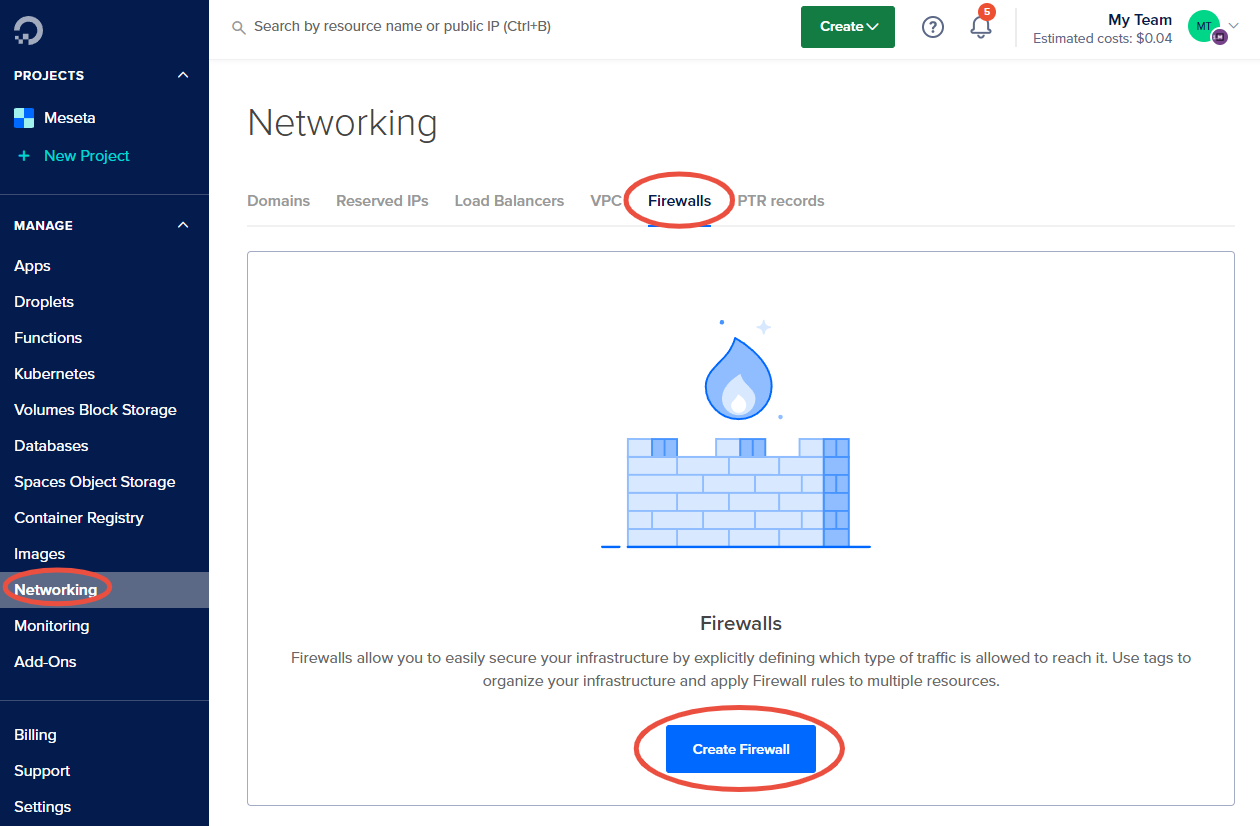
While you wait for the droplet to spin up, you might as well use this time to set up the firewall, which will help secure things. This is good practice to do. Click on the Networking section in the sidebar, then Firewalls tab, and then Create Firewall
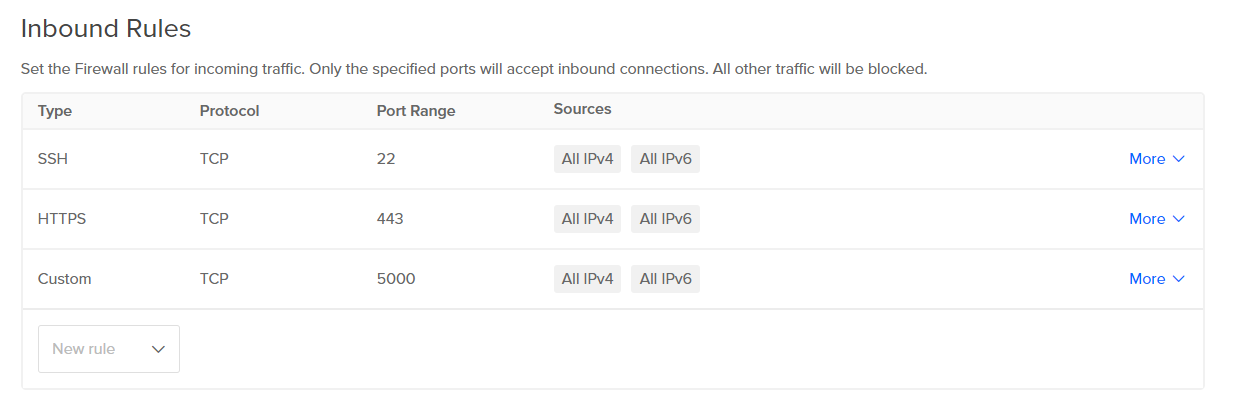
In the next dialogue, the only thing to add is some inbound ports to the Inbound Rules (you can leave the Outbound Rules as-is). You will want to keep the SSH (port 22) rule, since that's what GameMaker IDE needs to be able to access the server to make a build. At this point, if you already know what ports you will need for your game, add them, if not, leave it with just the SSH rule.
In the below screenshot, I have selected to add HTTPS on port 443 since I am going to be running a webserver, and a custom TCP 5000 rule since this is a port I frequently use for testing.
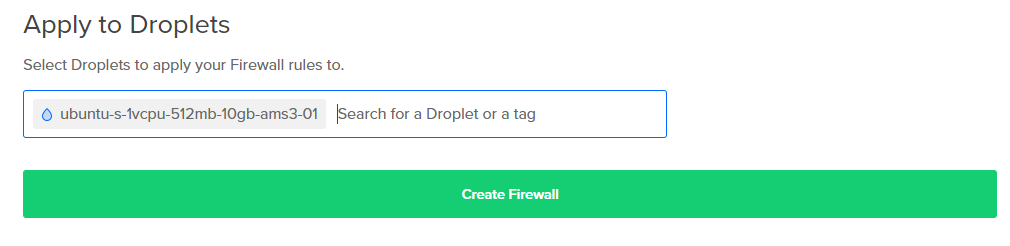
At the bottom of the page, in the Apply to Droplets section, type the name of the droplet you just created, to apply the firewall to it
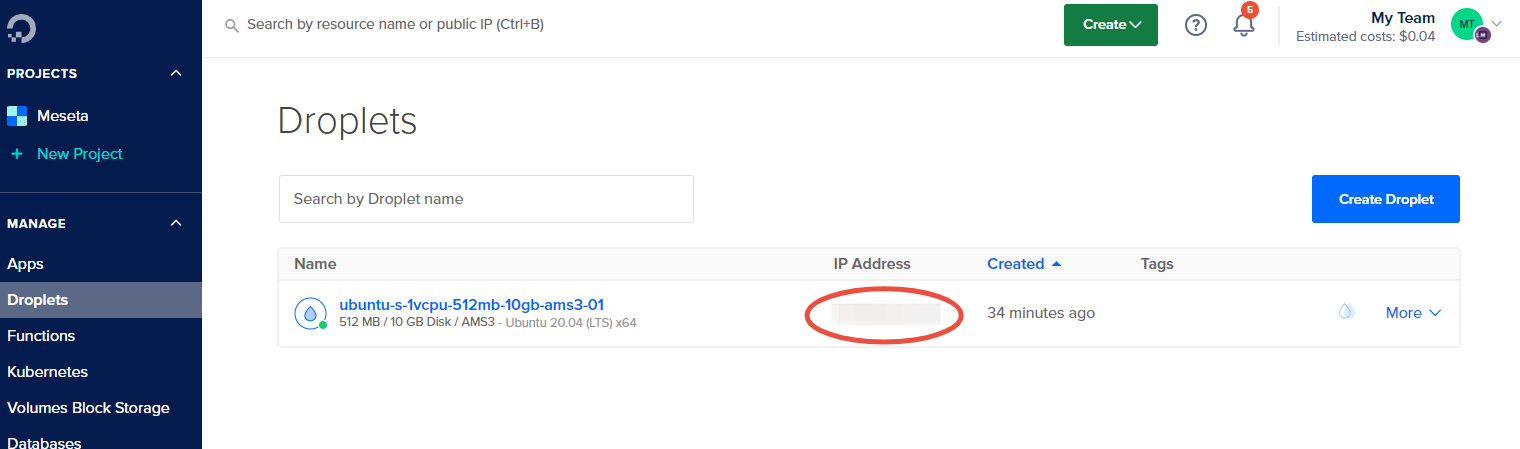
Finally, you will need your public IP address for your newly created droplet. You can find this in your Droplets details page as well as the Droplets list under either IP Address
Setting up GameMaker
Over in GameMaker IDE, we need to set up the IDE to be able to target this server when making builds.
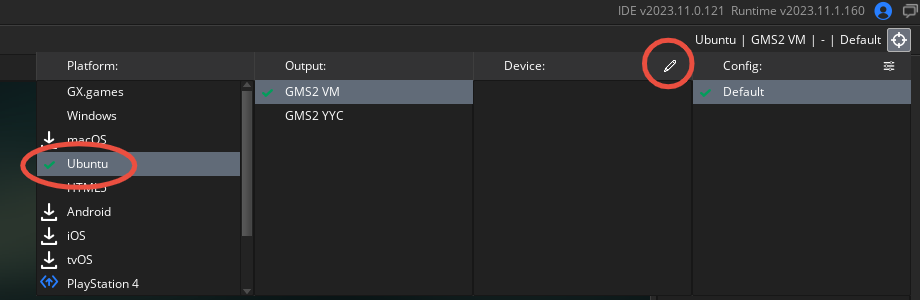
In the target selector (top right of screen) in your project, select the Ubuntu platform (at this point, if you don't have that installed, you'll be asked to do that), and click on the edit icon in the Device list.
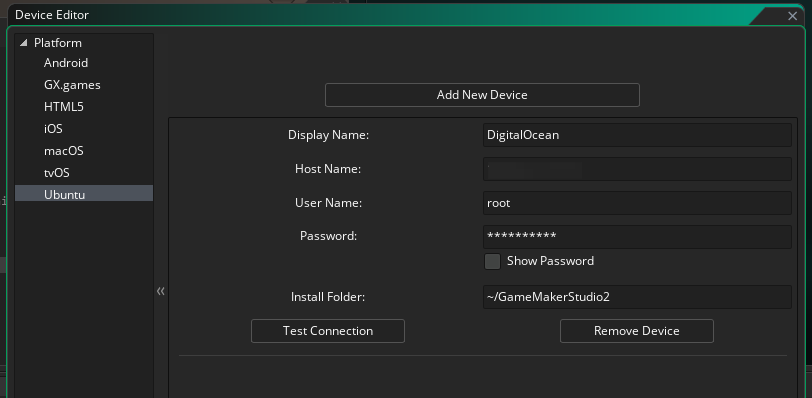
In the Device Editor, click Add New Device, and fill in the details.
- Display Name: this is anything you want
- Host Name: this is the IP address of your Digital Ocean droplet that you copied earlier
- User Name: this will be
root - Password: this is the password you set way back when you were setting up the droplet in the Choose Authentication Method
- Install Folder: you can leave this as default
And then that's it! Your IDE is now set up to make Ubuntu builds by connecting to the server.
If you need a quick test project to validate that it's working, throw this into a project, and check if it outputs it in the Output console.
show_debug_message($"Am I on linux? {os_type == os_linux ? "yes" : "no" }");GML considerations
There are a few considerations to make when running GameMaker on the server.
- Since there is no screen or graphical environment, you will want to turn off the draw event so that you don't waste CPU on drawing something that nobody is going to see This can be done easily by adding the following line of code somewhere in the project near the start:
draw_enable_drawevent(false); - Don't try to
show_message(), it'll crash since there isn't a graphical environment in which to show the message. - Since there isn't a need to run at 60 FPS, you may want to pick a lower FPS to reduce CPU usage. Although the exact value you pick depends on the needs of your server.
- Under the current setup, you won't be able to see any log messages, which may make it hard to see what the server is doing when you're not running it through the IDE
Running the game on the server
Ok, so here's the weird thing. GameMaker IDE v2023.11.0.121 currently has a little bug, where when you hit "Run" with the server targeted, it will build and run the game on the server, and then it'll just leave it running!
I'm quite sure this is unintentional, as every time you hit "Run", a new process will start up, meaning you will end up creating more and more instances of the game, which won't close automatically as you might expect.
To solve this problem, there was a little command at the bottom of the initialization script that is keeping an eye out for any situation where there is more than one copy of the game running (its process name is AppRun), and kill the older process, ensuring that however many times you hit "Run", you'll only have one copy of the game running. (Just be aware: could take up to a second to kill the old process, you may need to add a short delay to the start of your game if you are doing any server work, because the TCP port may not be immediately available before the old process is killed).
The benefit of GameMaker IDE leaving the game running on the server after you hit "Run" is that this is actually the desired behaviour for setting up and leaving your game running on the server! It means whenever you want to update your server, you just select the server in your targets list in the IDE, and hit Run, and then just quit the IDE, the game continues to run in the server in the background.
Unfortunately I suspect they'll fix this behavior at some point, and we'll have to find a new way to leave a server running. A problem for another time.
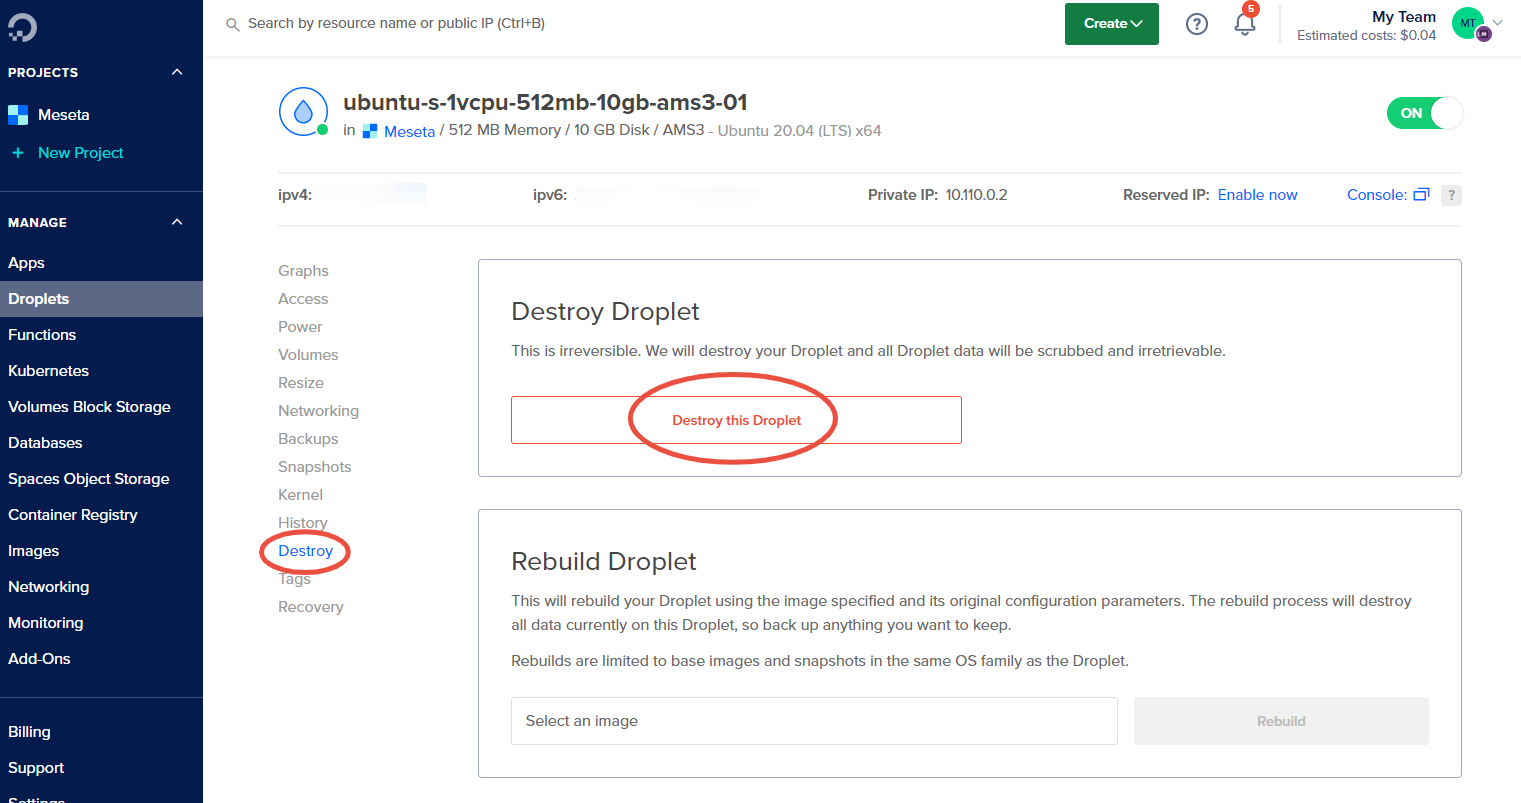
Cleaning up/Shutting down
When you're done with experimentation, and you want to just nuke everything, you can do so from the Destroy section of the droplet. This will stop any billing associated with the droplet.
Now you know how to run a GameMaker game on a Linux Server in the cloud. It's not the best way of doing it, but it should be the easiest.